3 tips for capturing gorgeous wedding details in any space
Filed in for photogs, mentoring shot by Ayres Photography on at
Part of our job as wedding photographers is to make everything look like the best possible version of itself. This includes our couples, their families and friends, their details, their venue – everything about their day! At the same time, we have to remain true to our own style and aesthetic, and create images that we’re proud to deliver. Sometimes though, especially for people who are having very large weddings, there are serious limitations on venue options. As soon as your guest list surpasses 200, the pool of venues you have to choose from shrinks dramatically. There are really only a handful of locations in Buffalo that can comfortably hold more than 200 people, so sometimes our couples have to choose between style and function, and function usually wins.
So, what can you do as a bride if you end up having to be in a space that isn’t a good fit for your style? Hire an excellent photographer who can make a place you feel “meh” about look like the venue of your dreams. And, what can you do as a photographer who has to work in a space that isn’t really a good fit for your overall vibe and style? Get creative and make it your own. I love the challenge of taking a space that I’m not wild about and creating images that are a perfect fit for my style and brand aesthetic.
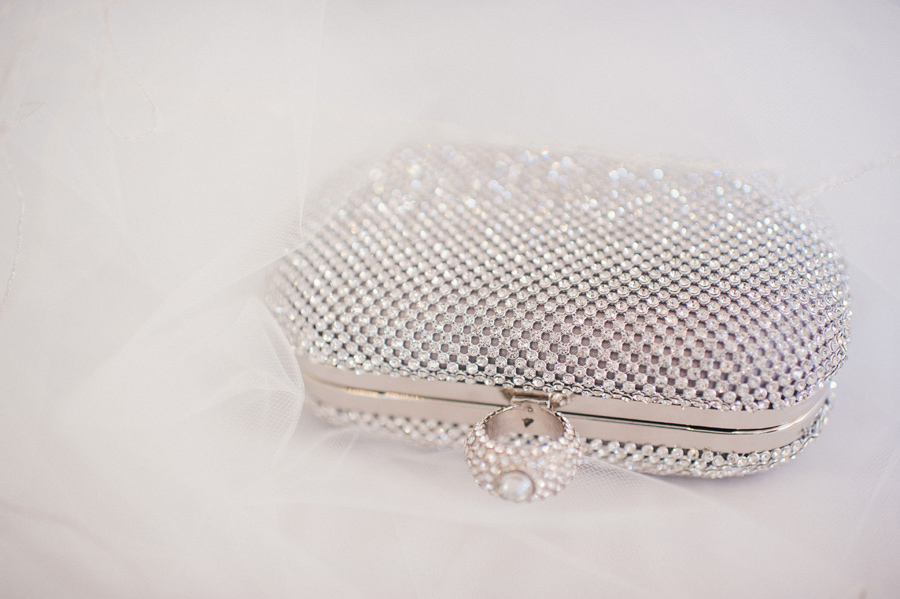
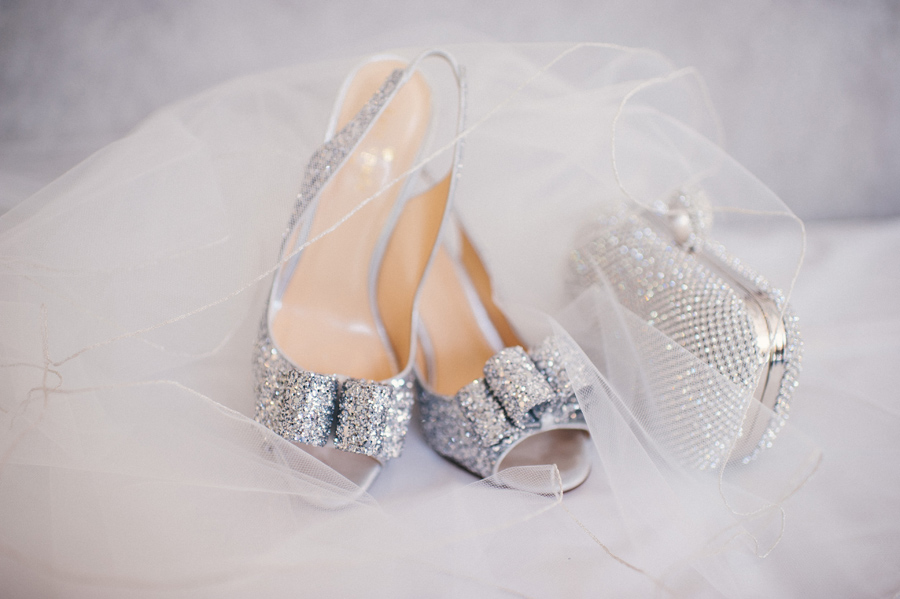
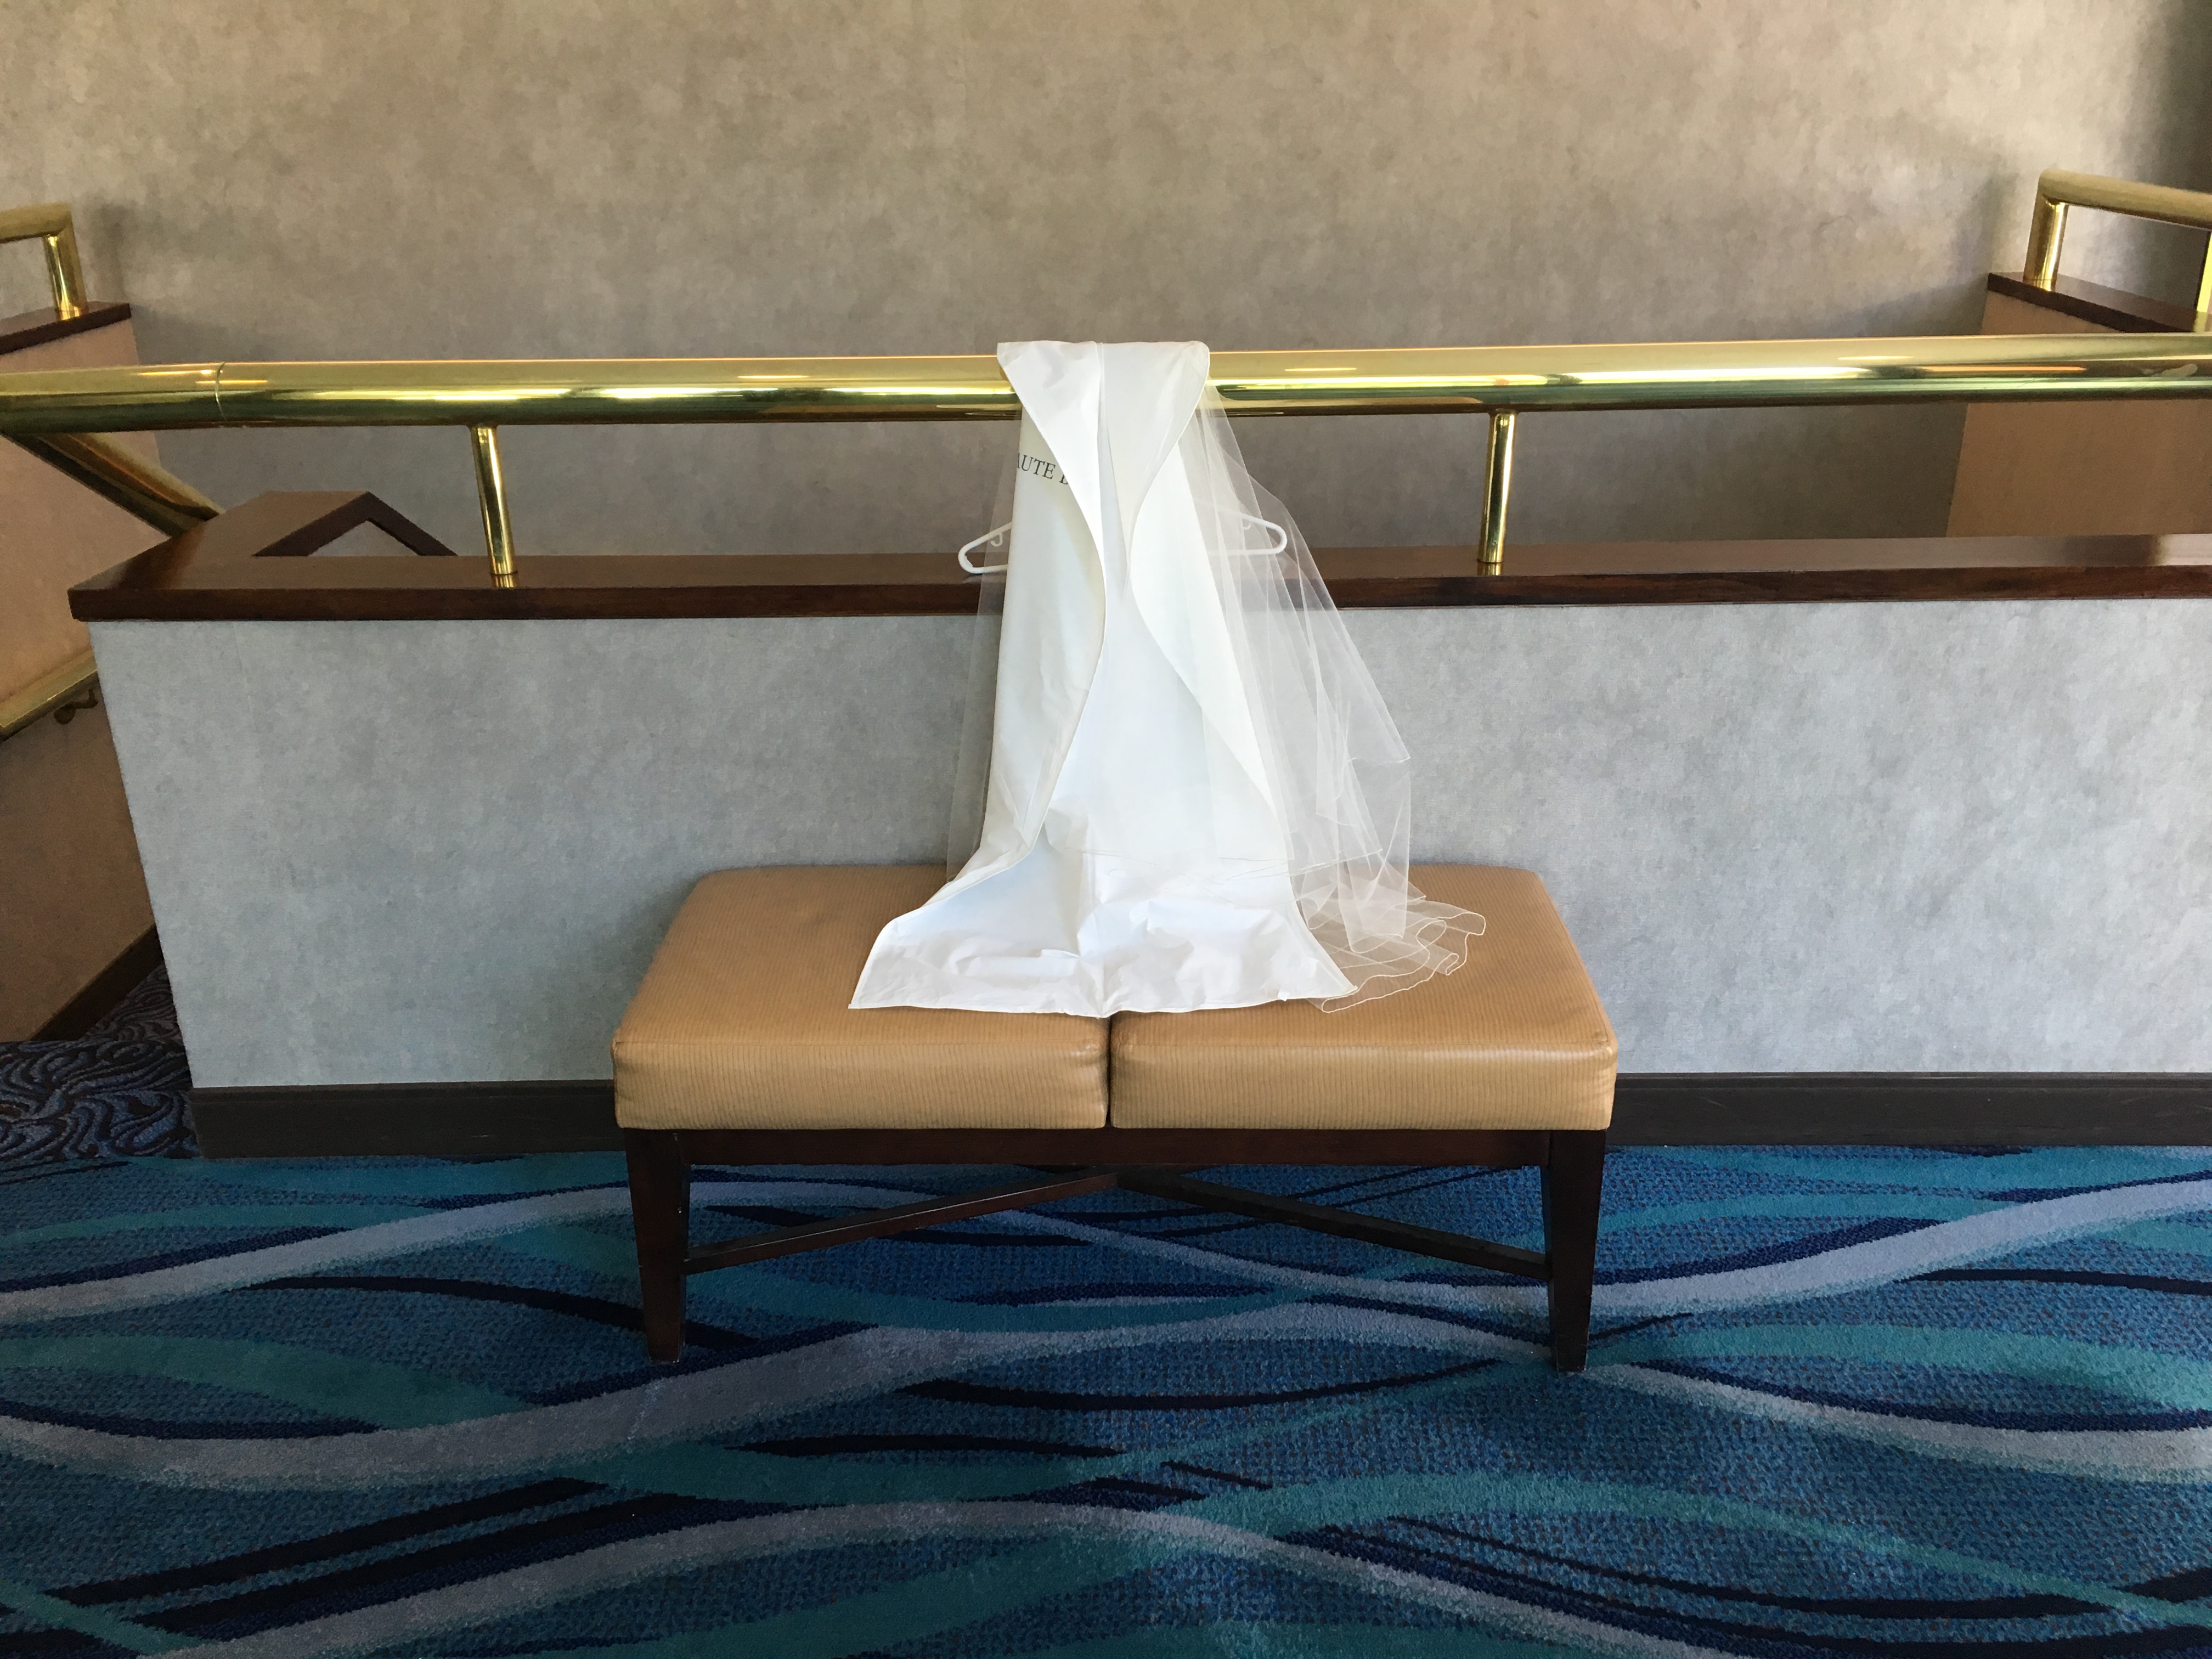
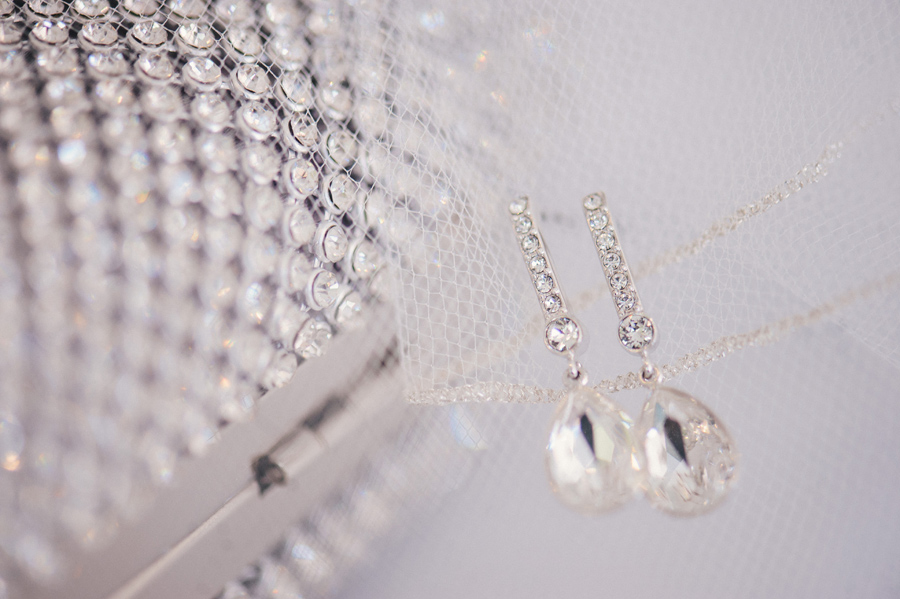
These are beautiful detail shots that look like they were taken in a bright, white, clean space with perfectly diffused lighting and lots of room to work. Some of those things are true, but overall, it was a space that wasn’t a good fit for my style and our couple didn’t love the style of it either. I took an iPhone photo that day to show you what I had to work with. Check out that gorgeous brass railing, dark wood, 80’s wall paper, and fabulous casino carpeting:
Shooting details in hotels that aren’t a good fit for your style is a common challenge for wedding photographers, so here are three tips to help you conquer the cheesy carpeting and emerge victorious:
1. Find ANYTHING white to use as a backdrop and/or reflector. In the above situation, I was short on time and wasn’t able to go on a quest to find white things, so I grabbed the only white things I could find: the bride’s veil and the white plastic dust bag it came in. Yep, that’s right; the background of these detail photos is a white plastic bag. In the past, I have used white table cloths, white bedspreads, sheets, and even the bride’s dress or a bridesmaid’s dress – all of those things will work to give you a nice clean backdrop for your details. Using a white background is a great idea because it will make the details pop and reflect beautiful light throughout the frame. Pro tip: don’t use a dress as a backdrop to style details if any part of it will touch the floor.
2. Bring your own bag of tricks. I started doing this a few years ago, and it really made a huge difference in the end result of my images. To every wedding, I bring a giant piece of poster board that is white on one side and black on the other. I bring various ribbons, vintage stamps, and other little accents that I use to style photos. I also bring a piece of blush fabric and a piece of lace that can be worked in if I need something extra. There’s no need to walk away from a situation feeling like it wasn’t everything you wanted it to be when you can just bring your own bag of styling goodies!
3. Shoot close, tight, and manual. There are times when I shoot details to include the environment I’m in, and there are times (like this hotel situation) when I choose to shoot close and tight to avoid an environment that doesn’t mesh with my aesthetic. For these photos, I used a very shallow depth of field and a macro lens to highlight the beautiful items and take attention away from the background. Using the veil or other textured items in the foreground creates a beautiful creaminess (bokeh) that draws the eye to the main subject in the photo and away from the background. Tulle and sparkly things are especially great to use! Also, using manual focus when shooting details close and tight allows YOU to choose what’s in focus rather than letting the camera choose for you, and that can create some really unique, stunning images. Manual focus takes practice, but it’s worth the time investment!
So, if you’ve ever been in a situation where you struggled to capture the details in a way that represented your style and brand aesthetic, I hope these tips were helpful to you! If you have questions, please feel free to ask! You can comment below or shoot me an email at info@ayresphoto.com. :) 

Jennifer LINK KIEFFER SAYS...
Great Tips! Styling is a huge part of beautiful photos. love seeing the before and after of the space.
Tam SAYS...
I absolutely love this!!! So neat to see the “what you see vs. what I see”!